
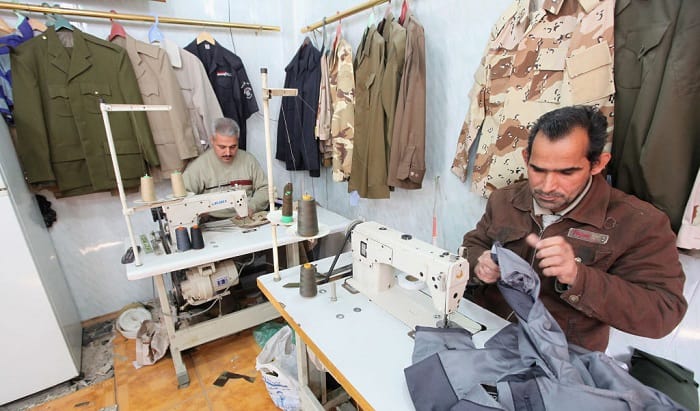
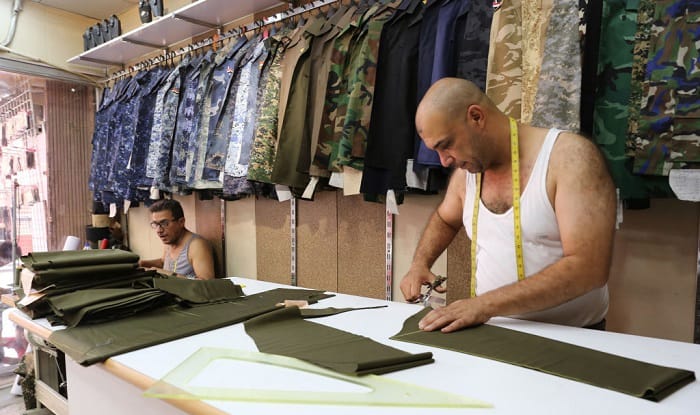
Military patches, also commonly referred to as insignias or badges, are an age-old tradition in service uniforms. From the Roman era and until today, they are a meaningful symbolic representation.
Not only in the United States, but these patches are also worn by military personnel all around the world to communicate rank, army, or division. More importantly, they showcase the military’s fighting spirit, pride, and patriotism.
Aside from the standard patch on the left side of a uniform, there are special patches awarded to soldiers, especially military leaders, to honor significant achievements.
If you want to wear a military patch, it is crucial to learn how to sew a patch on a military uniform. There are three methods that you can consider trying to sew military patches, as follows:
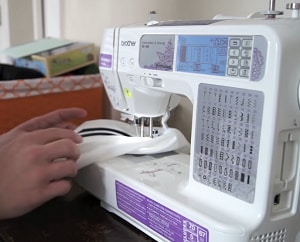
Method 1: Sewing by a machine
- Step 1: Lay out your uniform and iron it
- Step 2: Take your patch and position it onto the uniform
- Step 3: Temporarily secure the patch with tape or a pin
- Step 4: Set the sewing machine up and get ready for sewing
- Step 5: Thread the machine and start sewing at a low speed
- Step 6: Seal the patch and cut away any loose threads
- Step 7: Try on your newly patched uniform
Method 2: Sewing by hand
- Step 1: Lay out your uniform and iron it
- Step 2: Place the patch onto the uniform
- Step 3: Have the thread ready and cut it into a single piece if you want
- Step 4: Feed the thread through the needle’s eye and secure it with a knot
- Step 5: Start sewing from the inside of the uniform and going outwards
- Step 6: Continue sewing in a straight stitch pattern all the way around
- Step 7: Seal the patch with a tight knot and cut the excess length
Dive in for the details of each step!
Table of Contents
2 Ways to Sew on Military Patches
Method 1: Sewing By a Machine
What You Will Need to Have
The first method to sew patches on uniforms relies on a sewing machine and threads. The latter should be of the same color or closest as possible to your patch. Alternatively, the thread can be clear.
In addition, you will need to prepare an iron and a roll of adhesive ironing tape or a few clothing pins. Once you have all of these materials, you can jump right into sewing!
What You Will Need to Do
Step 1: Lay out your uniform and iron to remove any creases and wrinkles
First, begin by laying out your uniform and ironing it to smooth out any creases and wrinkles. This is an important step because you will have a permanent aesthetic eyesore if you sew over the creases and wrinkles.
Step 2: Take your patch and place it onto the uniform in the right position
Next, take your patch and position it onto the uniform. Make sure that it is in the exact spot you want before moving on to the next step.
Step 3: Temporarily secure the patch with ironing tape or a clothing pin
Now, cut a piece of the adhesive ironing tape that you have prepared and use it to secure the patch on your uniform. If you do not have tape, you can use a pin.
Step 4: Set the sewing machine up to get ready for sewing
Then, move to your sewing machine. Slip the garment onto the plate or deck and set the needle so that it is ready to make a straight stitch. Also, prop the presser foot in an “up” position. These are the generic steps for most sewing machines, but if it does not appear to be the same for you, make sure you refer back to your model’s manual.
Step 5: Thread the machine and start sewing at a low speed
Put your thread on the spindle’s bobbin. Fill the bobbin up before inserting it into the correct location on the machine. Turn the machine on and set a low speed to start. If you are used to sewing, you can use a higher speed.
Note: A slower speed is recommended for better control.
Press the foot pedal down to start sewing. As the needle runs, rotate your uniform as needed.
Top Tip: Before rotating, release your hold on the foot pedal. However, keep the needle in the same place to ensure a consistent pattern.
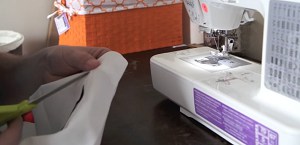
Step 6: Seal the patch and cut off any loose threads
At this point, you should have stitched all away around the patch. Seal it with a knot and use a pair of scissors to cut any loose threads. It is good to leave about a centimeter of the thread to keep the knot from bursting and ruining the stitches.
Step 7: Try on your newly patched uniform
You are good to go! All that is left is to remove your uniform from the sewing machine, put it on, and admire your sewn patch!
Method 2: Sewing By Hand
What You Will Need to Have
The second approach is hand-sewing. For this, you will need a sewing needle and thread. Like machine-sewing, the thread should be in the same color or as close as possible to the color of your patch. Otherwise, you can use a clear thread.
What You Will Need to Do
Step 1: Lay out your uniform and iron to remove any creases and wrinkles
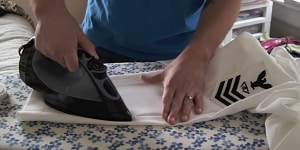
Like the first approach, start by ironing your uniform. Once you are sure that there are no creases or wrinkles left, move on to the next step.
Step 2: Place your patch onto the uniform and secure it with tape or a pin
Place the patch onto your uniform in the right position. Then, secure it with a clothing pin or fabric tape. Make sure that the patch is held firmly in place. Generally, it is easier to work with tape; you do not have to sew around the pin and worry about it poking you.
Step 3: Have the thread ready and cut it into a single piece if you want

Cut the thread that you have prepared into a single ~45cm piece. Do not go longer than this because it can be tangled easily. If you do not want to cut the thread, you can also leave it in the spool and sew simultaneously. This may be a good idea if you are more concerned about having to rethread your needle when you run out of thread midway.
Step 4: Feed the thread through the needle’s eye and secure with a knot
Feed the thread through the eye of your needle and secure it by tying a knot at the end of the thread’s length. If you have a needle threading accessory handy, it will help save some time and effort. Otherwise, it helps to twist the end of the threat and wet it slightly with your mouth. This should temporarily hold the thread stands together and make it easy for you to thread it into the needle.
Step 5: Start sewing from the inside of your uniform and going outwards
With the threaded needle, poke from the inside of your garment out and through the patch. Make sure you do not do the opposite and go from the outside to the inside because you want the knot of the threads to be hidden.
Step 6: Continue sewing in a straight stitch pattern all the way around
Continue sewing in a straight stitch pattern. This pattern is the easiest and quickest way to hold the patch on your uniform. Plus, it will be the least visible to make your patched uniform beautiful. Stitch all away around the patch to end at where you started.
This step is the most time-consuming but rest assured that the more effort you put in, the better the outcome will be.
You need to make sure that the length of the stitches and weaves are as even and consistent as possible. This will enhance the look of your patch.
Step 7: Seal the patch with a tight knot and cut the excess length
To complete, knot the thread by looping and pulling the needle to tie it off. Check that your knot is tight, then cut the hanging ends of the thread. Again, there should be about a centimeter length left to make sure the threads do not burst and become ruined. You can tuck the excess length under the patch if needed.
Conclusion
Now, you are free to perform any military uniform alterations with sewn patches. Hopefully, this article on how to sew a patch on a military uniform has been helpful. Also, if you have old military uniforms and you don’t know what to do with them, this article might help you! Before you leave, comment your thoughts and follow-up questions below!

I am Everett Bledsoe, taking on the responsibility of content producer for The Soldiers Project. My purpose in this project is to give honest reviews on the gear utilized and tested over time. Of course, you cannot go wrong when checking out our package of information and guide, too, as they come from reliable sources and years of experience.