After many adventures, you’ll find that your trusty tactical knife doesn’t have the edge that it used to. This, of course, is a fact of life—knife blades naturally get dull with wear and tear. But taking your tactical knife to a professional knife sharpener can be pretty expensive, not to mention you will have to leave your knife with them for a couple of days.
If this is a problem for you, then you might have to look into learning how to sharpen a tactical knife by yourself. Well, you’re in luck, because that’s what this guide is for.
I will be walking you through two common knife sharpening methods and giving you some important knife sharpening tips so that you can give your precious tactical knife a new lease on life. Let’s get started!
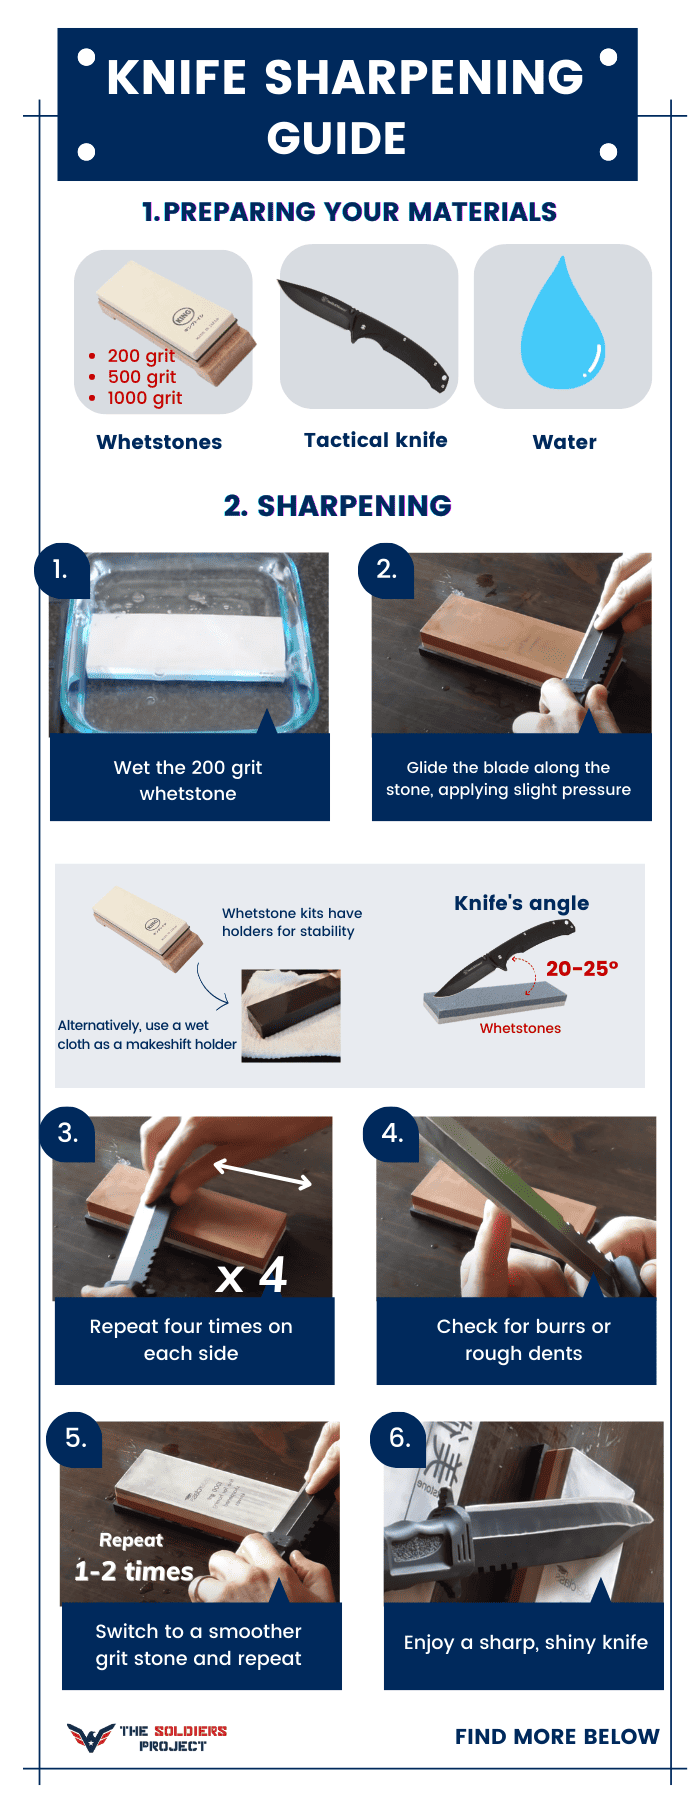
Table of Contents
How to Sharpen a Tactical Knife Using Whetstones
The first way you can sharpen a knife is with the use of whetstones. If you’ve never seen a whetstone before, you can think of them like sandpaper rocks—they are stones (typically cut into rectangles for convenience) that have one or two surfaces with a specific roughness.
Just like sandpaper, the level of roughness or grit of the whetstone indicates how polished the resulting surface will be.
Whetstones are actually the same tools that are used when you have your tactical knife sharpened by a professional. This is because, with enough skill, whetstones can provide a much cleaner and sharper blade edge.
Of course, this does mean that you’ll need a bit of practice to get it right, but once you do have this technique down, you’ll never have to pay for knife sharpening ever again.
Preparing Your Materials
As with all things that take practice, sharpening your tactical knife with whetstones requires a bit of preparation. To get started, you will need three things: your tactical knife, whetstones, and water.
To get the best results from your knife sharpening, you will need multiple whetstones. As I mentioned earlier, whetstones come in multiple grit levels, namely 200 grit, 500 grit, 1000 grit, 4000 grit, 8000 grit, and 30000 grit.
In most tactical knives, you won’t ever need to use higher grit whetstones when sharpening your knife because the thinner resulting edge will dull much more quickly. So for this guide, I will recommend getting the 200 grit, 500 grit, and 1000 grit whetstones only.
The final edge you will get with the 1000 grit whetstone, from my experience, strikes the best balance between sharpness and durability.
Setting Up
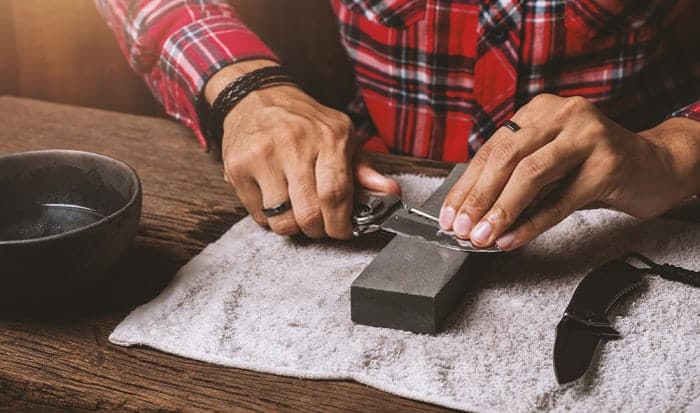
Once you have all of your materials on hand, the next step is to get everything ready for the sharpening. The first thing you would want to do is to lay all of your materials out on a flat surface that doesn’t wobble, like a counter or a table. This is important as a shifting whetstone will affect the edge of your tactical knife.
Now when you buy a set of whetstones as part of a knife sharpening kit, that kit will usually come with a weighted holder that keeps the whetstones steady as you sharpen the knife. The way it works is quite similar to a workshop vise, so seat the whetstone in between the jaws of the holder and tighten it until the whetstone is secured.
If you don’t have a whetstone holder, though, a good alternative is to put your whetstone on a thick cloth. Wetting the cloth before placing your whetstone on top helps keep the cloth from sliding for steadier sharpening.
Another thing to look out for is the angle of your tactical knife edge (also called the “bevel”). The manufacturer of your tactical knife will usually have information on this in their service manuals or their marketing materials, so be sure to look this up to get the best results when you sharpen a combat knife.
If you can’t find this, however, tactical knife edges will usually fall in the range of 20-25 degrees, so use this as a rule of thumb.
With that all out of the way, it is now time to get sharpening.
Sharpening
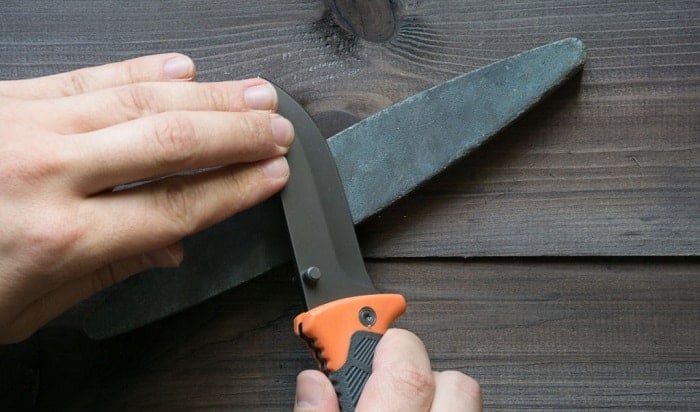
Just like with creating a smooth wood finish, sharpening your knife down to a clean edge involves a progression from a rough grit to a fine grit. With this in mind, start by mounting your 200 grit whetstone and wetting it with water—the water acts as a lubricant that ensures a smooth glide when running your tactical knife blade along the whetstone.
With the whetstone placed lengthwise in front of you, set your tactical knife horizontally with the edge in the direction away from you and with the blade set at the right angle. Maintain a firm grip on the handle with your dominant hand and press onto the flat side of the blade with the fingers of your opposite hand to balance the force you put on the knife.
Keeping this position, run the blade along the length of the whetstone from the base of the blade to the tip. Put a bit of pressure on the knife blade as you move along—just enough to make sure that the blade edge makes contact with the whetstone. (A good way to visualize this motion is that it is like trying to shave the whetstone.)
Do this about four times, making sure that the entire length of the blade is covered. Afterwards, flip the blade towards you and repeat the process in reverse, pulling the blade towards you as you run it along the whetstone. If your whetstone feels like it has dried out, pour some water over the top to keep it lubricated.
After this back-and-forth of four strokes each, check the edge to see if it has any burrs (raised bits of metal that were left over from sharpening) or rough dents. If there are still some inconsistencies in the blade, repeat the sharpening process until there are no more burrs. Once that’s done, swap out the rough whetstone with a smoother grit whetstone and repeat the process one or two more times.
At the very end of it all, your knife blade should be shiny, smooth, and most of all, sharp.
Using Pull-Through Tactical Knife Sharpeners
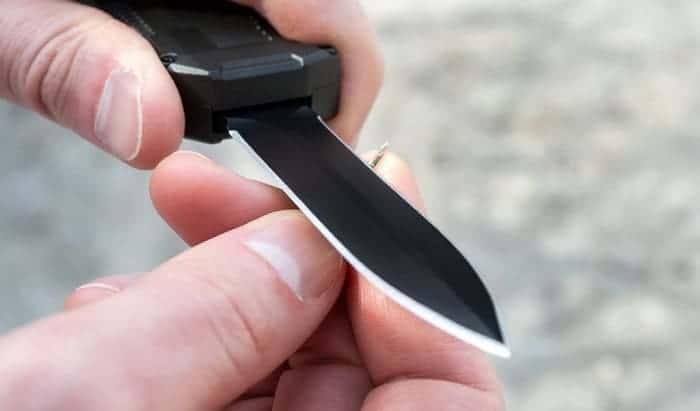
Now, if the process I’ve just explained above looks like way too much work to do, an easier way to sharpen your tactical knife is to get a pre-made tactical knife sharpener. These are handheld tools that consist of a handle and two abrasive pieces that are already set in a pre-set angle.
Based on my description of this tool, you can probably tell that a combat knife sharpener is much easier and more convenient to use compared to the lengthy, complicated, and difficult process of sharpening with whetstones.
And indeed, they are incredibly easy to use—simply put your tactical knife blade into the abrasive groove in the sharpener and pull the knife blade through several times. It’s as easy as that!
But of course, this convenience does come with its drawbacks. For one, pull-through knife sharpeners won’t produce the same level of blade sharpness as smoothness as a set of whetstones can. The fixed angle and grit of these sharpeners also mean that there is no way to adjust them to the exact bevel angle and level of polish that you want.
In general, though, if you are in a hurry to sharpen your tactical knife, pull-through sharpeners are a perfectly valid option to touch up your blade in just a couple of minutes.
Conclusion
If you’ve reached the end of this guide on how to sharpen a tactical knife, congratulations! Your trusty tactical knife should now have a shiny and sharp new edge that’s ready to take on whatever your next adventures throw at it.
I hope that this guide has helped you through the painstaking but hugely rewarding process of knife sharpening. If you liked what you’ve read or have any additional insights, let us know in the comments section. Thank you for reading!

I am Everett Bledsoe, taking on the responsibility of content producer for The Soldiers Project. My purpose in this project is to give honest reviews on the gear utilized and tested over time. Of course, you cannot go wrong when checking out our package of information and guide, too, as they come from reliable sources and years of experience.