If you are an adventurer planning to be a serious mountaineer and orienteer, it is essential to learn and master how to use a lensatic military compass, whether for competition or just leisure purposes. Believe us when we say that your life depends on this skill.
For some, learning the principles of reading a compass may be intimidating, which is why we made this article as simple to understand as possible — great for beginners!
Learn how to use a lensatic compass in just five to six steps, depending on which technique you prefer: Center-Hold Technique or Compass-to-Cheek Technique.
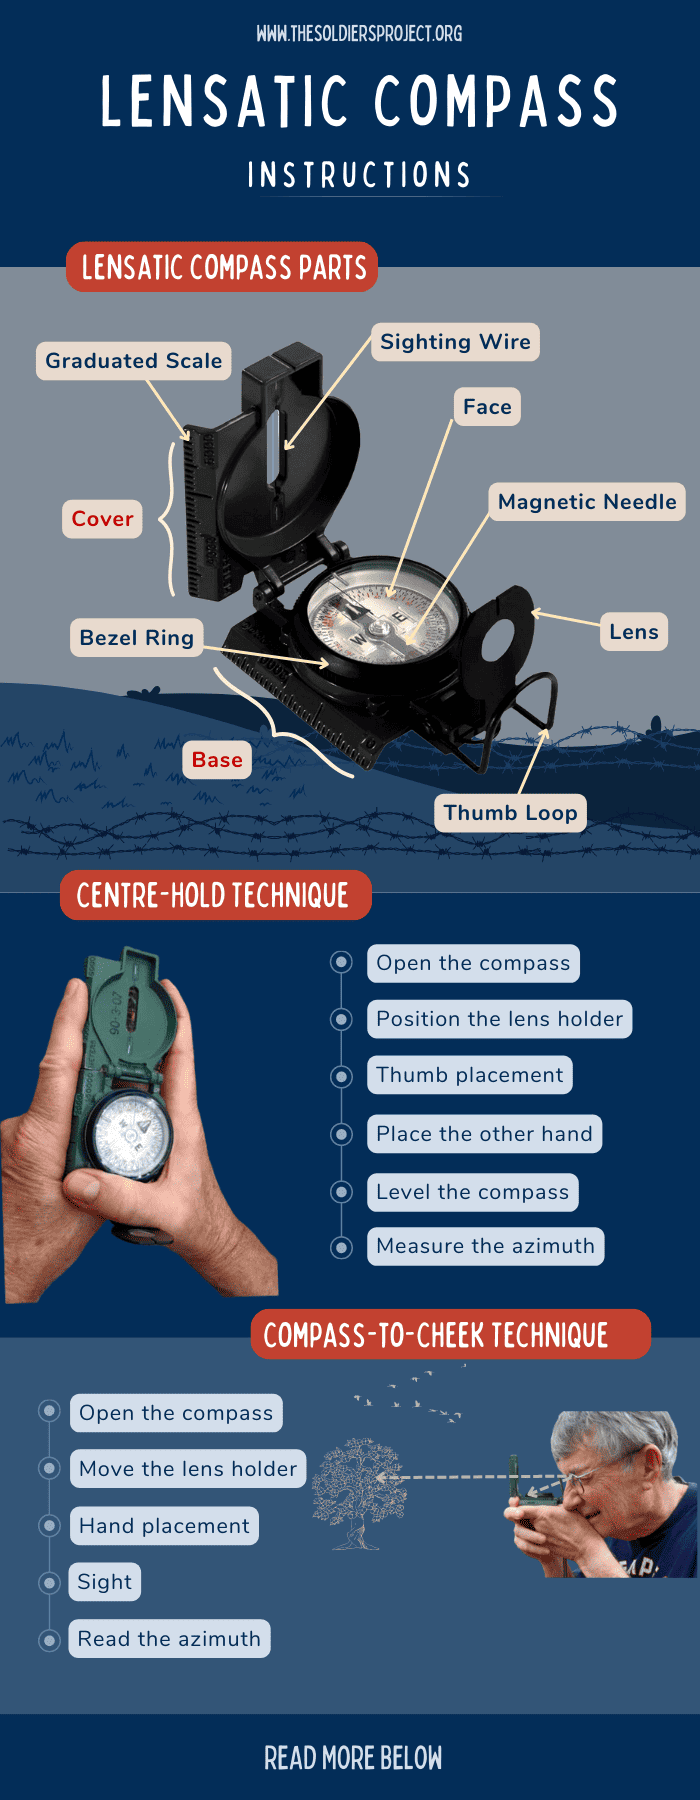
Table of Contents
What You Will Need to Follow This Tutorial
In this tutorial, you’ll only be needing one thing:
Lensatic Military Compass
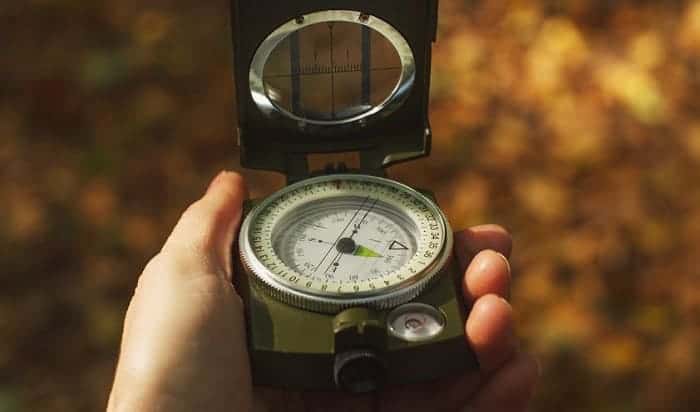
There are several types of compasses, but why use a lensatic one? A lensatic compass is a type of magnetic compass and is among the most accurate in the market. It is mainly manufactured for military use, thus the aluminum-grade build and high durability. It is the current US military compass used.
Compared to other kinds of compasses, a lensatic compass allows you to read the bearings while sighting the objects all at the same time, without changing eye position. It also has the sighting wire, which helps in determining the azimuth more accurately.
All lensatic military compasses are the same when it comes to parts and features, so your choices will be a bit limited. Your deciding factors when purchasing one are likely to be its quality, finish or appearance, and budget.
Personally, I prefer spending a bit more and going with military-grade lensatic compasses as they are more durable and often have the illumination of either tritium or phosphors, making them convenient during the nighttime.
Although we only need the compass for this tutorial, we also recommend acquiring other basic navigation tools. You can use a lensatic compass with a map and protractor next time you’re studying land navigation. Also, check this guide to find out how to read a military map correctly.
Step-by-Step Guide on Using a Lensatic Military Compass
There are two types of techniques for military lensatic compasses when determining magnetic azimuths: the centre-hold and compass-to-cheek. We will share both of their step-by-step guides so you can try them and choose which method works best for you.
But before anything else, there are three things you need to do to prepare your lensatic compass:
1. Learning the parts
Familiarising yourself with the different lensatic compass parts will make learning to use it significantly easier. It has three main parts: lens, cover, and base.
- Lens: The rear sight slot is found on the lens where you can read the dial. It can also be used to lock the compass with the cover and keep it secured.
- Cover: The cover holds the sighting wire as well as the luminous sighting dots necessary when navigating at night. It also protects the floating dial and the crystal when closed.
- Base: On the other hand, the base contains the floating dial, the crystal that protects the dial, the bezel ring, and the thumb loop.
Other important parts you need to remember include:
- Thumb loop: It is the thumb loop that serves as a lock that secures the compass when closed. As the name suggests, your thumb goes into the thumb loop, so the device remains stable in position when you’re sighting.
- Sighting Wire: It is used for sighting when determining direction or exact azimuth.
- Compass Dial: The compass or floating dial has two scales: outer scale for mils (black) and inner scale for degrees (red). It is mounted to float freely.
- Bezel Ring: It secures the glass crystal. The bezel ring can be turned — and with every turn, there’s a corresponding click. In total, it contains 120 clicks, where each equates to three degrees of declination.
- Black Index Line: It is a fixed line on the glass used as reference for the direction.
2. Inspection
Inspecting your compass before you use it is necessary, especially if it is newly bought. Make sure to cover the following to make sure your lensatic compass is in excellent condition:
- Check the glass crystal. Make sure there are no cracks or damages.
- Check the compass dial. It must be floating freely, which means it should not be sticking, and the numbers are readable.
- Inspect the cover. The sighting wire should be straight.
- Check the lens. The lens cover should be straight and flat on the crystal glass, and when closed, the sighting wire should be crossing the middle of the sight slot.
- Inspect the black index line. It must also be aligned and in the middle of the sight slot.
- Check the bezel ring. It should be working correctly for nighttime use. Listen to determine if the clicks are produced for every turn.
- All luminous parts should also be visible when it’s dark.
3. Calibration
Once you are done inspecting your device, it is time to calibrate to ensure its accuracy. If the azimuth shot has more than a three degree-difference from the calibration point azimuth, the compass is not functional.
Now, Onto the Compass Techniques
1. Centre-Hold Technique
The centre-hold technique is preferred by a lot of orienteers when using a lensatic compass because of how easy and convenient it is. It is suitable for any visibility conditions as well as various terrains. Follow the detailed steps below to see for yourself.
- Open the compass: Fully open the compass until the base and cover form a straightedge.
- Position the lens holder: The lens should be moved to the rearmost position, forming a 90-degree angle from the base.
- Thumb placement: Insert your thumb in the thumb loop and let the rest of your fingers support the base. Place your index finger on the side of the compass and the other three under the base.
- Place the other hand: The thumb of your other hand should be resting between the bezel ring and the rear sight while the index finger is also extended along the side of the compass. Then place the rest of the fingers below the other hand’s fingers supporting the base.
- Level the compass: The next thing you have to do is to firmly position your elbows next to your body, placing the lensatic on the same level as your stomach.
- Measure the azimuth: Finally, to determine the azimuth, along with your entire body, point the cover towards your desired direction or object. Then check the black index line to see the azimuth below it.
2. Compass-to-Cheek Technique
Although the first technique is more accessible, this second one delivers much more accurate data. For sighting purposes, we recommend using the compass-to-cheek method for better accuracy. Just follow these lensatic compass instructions:
- Open the compass: Let the cover and the base form a 90-degree angle.
- Move the lens holder: Slightly push forward the lens holder. Make sure the degrees of the dial are readable.
- Hand placement: Insert your thumb through the thumb loop and the index finger along the compass. Place the three remaining fingers below as if you are holding a gun. On the other hand, wrap the fingers around the three fingers below the compass.
- Sight: Now peek through the rear sight slot, aligning the sighting wire or the front sight to the desired direction or object. Your cheek should be resting on the base of your thumb.
- Read the azimuth: Lastly, ensuring the dial is floating, look down on it and read the azimuth.
Conclusion
Did you find following this tutorial enjoyable? Remember that your entire orienteering experience, and most importantly, your safety, relies heavily on how proficient you are in compass reading and land navigation in general. Knowing how to use a lensatic military compass will guide you and ensure you’ll find your way.
Keep reviewing and practising these steps until you can do them without any written guide. You’ll be a master in no time, and soon you’ll be ready for your next adventure. Let us know if you learned from this tutorial by commenting your thoughts down below.

I am Everett Bledsoe, taking on the responsibility of content producer for The Soldiers Project. My purpose in this project is to give honest reviews on the gear utilized and tested over time. Of course, you cannot go wrong when checking out our package of information and guide, too, as they come from reliable sources and years of experience.